(Updated April 9, 2025)
Labor Day weekend is almost here and Allergy Dragon has dessert covered for your BBQ gathering. This easy recipe for Coconut Lime Frozen Delight doesn’t require fuss to make and is a fun project to get the crew busy in the kitchen between dips in the pool or dashes through the sprinklers.
Thank you Allergy Dragon for sharing this recipe with our community!
“I make ice cream disappear. What’s your superpower?”
—Unknown
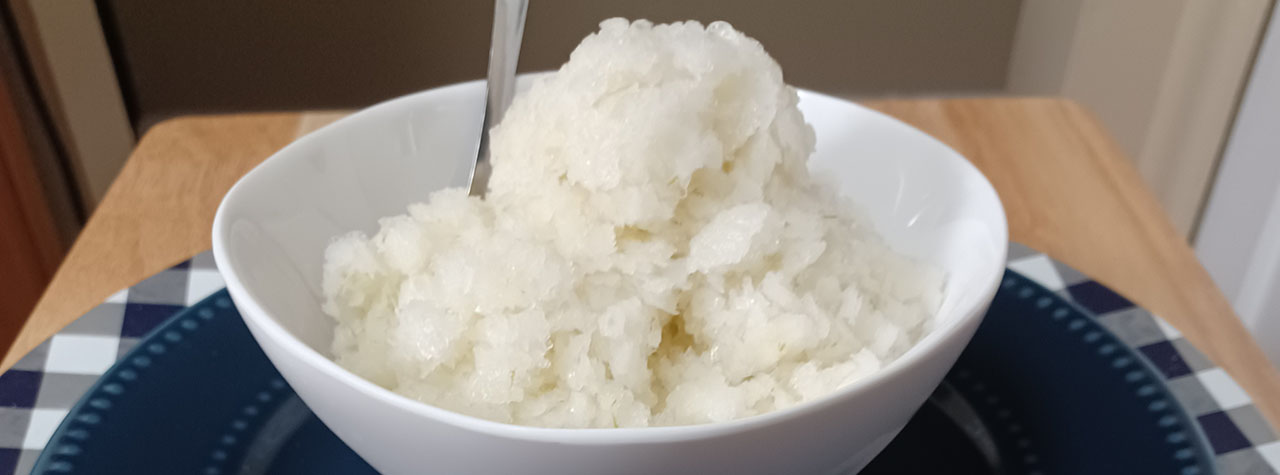
As summer wanes and Labor Day’s last ‘hurrah’ arrives, I thought something cold and tangy would be just the thing to add to your Labor Day BBQ menu. Who doesn’t love a refreshing little something for dessert — allergy friendly of course! — after indulging in BBQ with all the fixings? This Frozen Delight tastes just like a key lime pie.
Get your crew helping in the kitchen — whisking the simple syrup while it cooks, washing and drying limes, juicing limes, stirring it all together. The hardest part of making this recipe is waiting for it to freeze! 😉
A word about the coconut milk used in this recipe. The U.S. Food and Drug Administration (FDA) used to recognize coconut as a tree nut, but in the FDA’s Guidance for Industry (January 2025 Edition) coconut was removed from the Tree Nut list of major food allergens (MFAs, commonly referred to as ‘Top 9 allergens’). Technically, coconut is a drupe, a type of simple, fleshy fruit with a single seed enclosed within a hard, stony covering (think peach or olive). If you are concerned about the safety of eating coconut, please consult with your medical provider.
Get the recipe…
Coconut Lime Frozen Delight
(Serves approximately 4)
Ingredients
- ¼ cup of sugar
- 2 limes
- 14 oz can of coconut milk (See tips!)
- 5 oz of water
Let’s get started!
- Pour the water into a small pan, and bring the water to almost a boil over medium heat.
- Add in the sugar and stir constantly until the sugar completely dissolves.
- Remove the pan from the heat and let the syrup cool for about 30 minutes.
- Wash and dry your limes.
- Zest the limes. (Avoid zesting too much of the bitter white flesh found underneath the bright green skin.)
- Squeeze the juice out of the limes into a bowl.
- After the syrup has cooled for at least 30 minutes, add in the lime zest, the lime juice, and the coconut milk.
- Whisk together until well incorporated.
- Next, pour into a freezer-proof container and allow to cool completely in the refrigerator for at least 2 hours. (See tips!)
- Then freeze in the freezer for about 4 to 6 hours, or until firm. (See tips!)
- Before serving, remove from the container and beat with a whisk or food processor to break up any ice crystals.
- Then scoop to serve in your favorite dishes.

Frozen Delight dessert that’s like a key lime pie flavored Italian ice! Yummmm!
Tips
1. Best Coconut Milk to Use:
You can use what ever type of coconut milk you’d like. Coconut milk with a lower fat content will make the finished Frozen Delight less creamy. Coconut milk with a higher fat content will make it more creamy.
2. Substituting for Coconut Milk:
You can also use different ‘milk’ — like oat, or soy, or nut milks, or rice milk — in place of the coconut milk. Again, the amount of fat in the ‘milk’ you use will change the final consistency (more creamy vs. less creamy) of the Frozen Delight.
3. Time in the Fridge:
I have kept the recipe in the fridge overnight and popped it into the freezer the next morning. That works fine!
4. Time in the Freezer:
- Do not over-freeze the recipe because it will become hard to work with.
- You will want to check it at the 4 hour mark and mash it up even if it’s not completely frozen to ensure a nice consistency when completely frozen.
- If you let the Frozen Delight freeze longer than 4 to 6 hours, you may have to leave it out on the countertop at room temperature for approx. 20 minutes before trying to mix and serve it. If you need to break it apart, use an ice shaver or a food processor.
- If you want a creamier or smoother texture that’s less Italian ice-style, put the Frozen Delight in the food processor right before serving. It’s delicious either way!
5. Doubling the Recipe:
This recipe can be doubled. But if you double it, you will need to double the freezing time.
6. Using an Ice Cream Maker:
If you have an ice cream maker you can make this recipe with it. Use the same settings you would use for making ice cream.
Bon appetit!
In case you didn’t know, I hold classes 1 to 2 times a month and you can find the schedule of upcoming classes here. The classes are offered in person and via zoom. If you’ve registered, you’ll be able to access a recording after the class to review the lesson.
In my most recent hybrid classes we made cupcakes and no-cook easy breakfasts. In my most recent custom private classes we made country fried steak with gravy for a family living with corn, wheat, legume, tree-nut, coconut, peanut, dairy, soy, and egg allergies. I invite you to come learn with me.
 |
Chef Martha Morgan (aka Allergy Dragon) is a specialty diet and allergy chef who shares tips, tricks and best recipes from almost 30 years of professional cooking experience. |
| About the Author: Chef Martha provides support in the kitchen to everyone with food allergies, food intolerances, and specialty diets. Her expertise includes providing a full range of cooking guidance in the kitchen from technique, to finding safe products, to handling those new products, to creating (or re-creating as the case may be) recipes.
Connect with Allergy Dragon at her website and on social media on Instagram (@allergy_dragon), Facebook (@allergydragon), Twitter (@AllergyDragon), and LinkedIn , and follow Allergy Dragon on YouTube. |
|
Images: Courtesy of Allergy Dragon and Nha Van on Unsplash


